

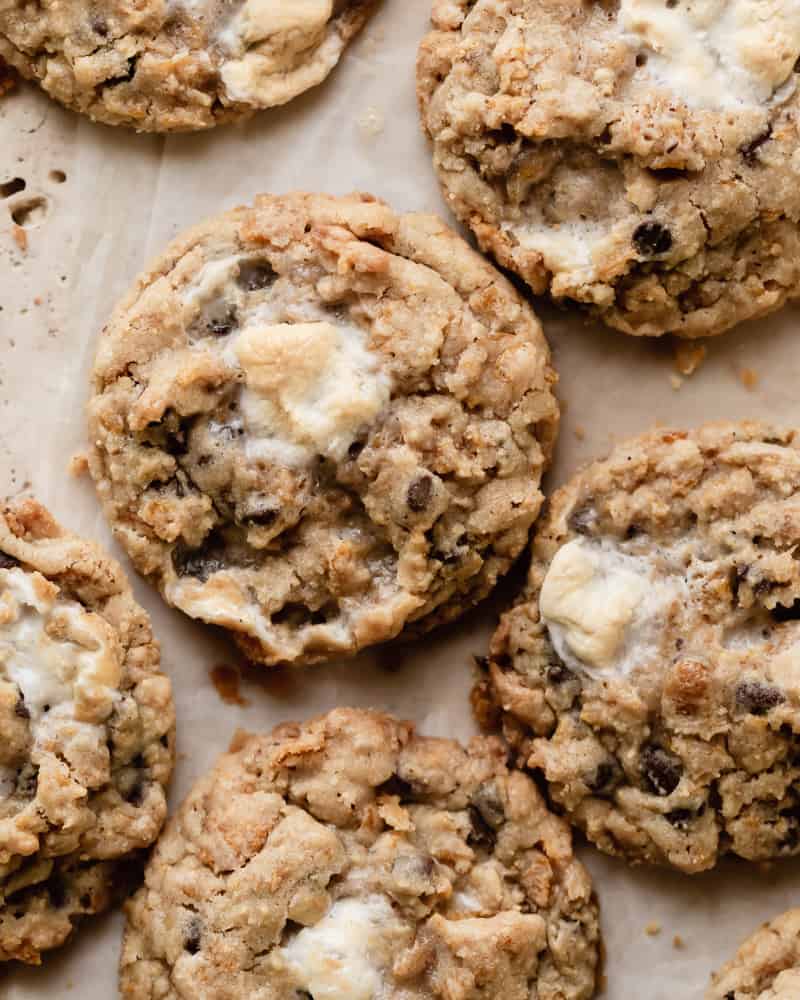
Milk Bar Cornflake Cookie Recipe
Milk Bar's infamous cornflake chocolate chip marshmallow cookies have been on my to-do list for years. And I'm honestly kicking myself for not making them sooner because they are a revelation. Crispy yet chewy and sweet and salty with caramel notes throughout. And 100% addicting. However, these cookies are notoriously finicky to make. But, luckily, I love a good challenge. I tested a few methods and made a few tweaks and adaptations to the original recipe found in the Milk Bar cookbook and finally landed on this version. And, I have to say. They're my perfect version of Christina Tosi's famous cookie and I'm so excited to share them with you!
Troubleshooting the famous cookie recipe:
As I mentioned before, these cornflake chocolate chip marshmallow cookies have earned a reputation amongst home bakers as being fussy and high maintenance. After reading countless baking fails and recipe reviews, it's obvious that this cookie hasn't been easy to replicate at home. Which is surprising for a cookie recipe. The most common and recurring baking fails were: cookies spreading, marshmallows burning, flat cookies, and cookies turning into an inedible, gooey mess.
So I've been on a mission to perfect these cookies in hopes that we can all have a little piece of Momofuku Milk Bar's magic at home. Listed below I have outlined the changes I made (and why) to the recipe and all the tips and tricks to master these cornflake crunch cookies. But, don't just skip through these as they aren't just mere suggestions. They are all non-negotiable if you want to avoid the aforementioned baking mishaps.
What changes I made to Christina Tosi's original recipe:
- Reduced the sugar: I reduced the sugar by 25% since the original recipe calls for a LOT of sugar (400 grams of sugar to 240 grams of flour). I'm not surprised that quite a few people said the cookies were way too sweet. Plus, since I know spreading is a major issue, then I thought reducing the sugar would be a good starting point.
- Swapped the sugars: I personally love the caramel notes of brown sugar in cookies so I made the personal decision to swap the two sugars resulting in a higher ratio of brown sugar to granulated sugar. I think the brown sugar perfectly complements the caramelized milk powder in the cornflake crunch and toasty marshmallows.
- Increased the flour: I increased the volume measurement for the flour to 2 cups. In metrics, 1 cup of flour weighs about 125 grams, so I thought the 1 ½ cups the original recipe calls for was a bit too shy seeing as the weight measurement is for 240 grams of flour. I suspect this might be one of the main sources of everyone's cookie mishaps. So I've amended that on my recipe.
- Reduced the baking temp: I reduced the baking temperature to 350°F instead of 375°F. I read that a lot of people ended up with burnt, crispy cookies so I went with the standard 350°F.
- Browned the cornflake crunch butter: For the cornflake crunch, I browned the butter for two reasons: 1) for flavor, 2) reduce the water content in the butter. Again, I was worried about cookies spreading so I sought to minimize any potential causes.
- Do not flatten the cookie dough balls: The original recipe says to flatten the cookie dough balls prior to refrigeration, but I don't. I did try both versions for good measure and did not find much of a difference, so save yourself an extra step and keep them as scooped cookie dough balls. I also read somewhere that when Christina demoed these on "The Chef Show" she says she likes to keep the cookie dough balls tall so they don't flatten.
Tips to perfect Milk Bar's cornflake chocolate chip marshmallow cookie:
- Use a scale (if possible; if not, see tip below): For the best results, I highly recommend weighing your ingredients to ensure accuracy due to the finicky nature of this cookie. This alone will greatly increase your success rate. Scales are affordable and weighing your ingredients is the most accurate and precise way to bake (and the only way I bake). You'll get the same results every time whereas using cups to measure ingredients can vary and everyone measures their ingredients differently (scooping, leveling, eyeballing, etc.). However, I understand this may not be an option for everyone so read below about the spoon and level method if you don't have access to a scale.
- Use the spoon and level method: If you don't own a scale, then be sure to use the spoon and level method when measuring your flour. Simply scoop the flour into the measuring cup using a spoon and then level off the top. This is the closest you'll come to weighing your ingredients and this method applies to most recipes (not just mine) unless stated by the author. When you scoop a measuring cup straight into the bag of flour or flour container, then you're packing the flour into the cup resulting in more flour than the recipe calls for. You only want to pack your brown sugar. Not your flour.
- Use bread flour: The original recipe in both the cookbook and on the website says "flour" which can be misleading as most people including myself would assume "flour" means all-purpose flour. However, in the introduction section of the Milk Bar cookbook, Christina Tosi mentions that she uses King Arthur Baking's bread flour in most of her cookie recipes. So, if you skipped the introduction section or found the recipe online, then you may be led astray. But, does bread flour make a difference? Yep. Bread flour has a higher protein content which yields a chewier cookie.
- Use room temperature ingredients: The eggs and butter should be room temperature to help with the creaming process. You don't want warm, soupy butter, and don't want your butter to be too hard. Butter that is around 70°F is the sweet spot.
- Cream your butter for 10 mins: Yep. That's right. Christina Tosi follows her 10-minute creaming method. Cream the butter and sugar for 3 minutes. Then add the egg and cream for another 7 minutes for a total of 10 minutes. Not one minute shorter than that. It's an absolute requirement. Why? You want to sufficiently cream the butter, sugar, and eggs to aerate the ingredients and create an emulsion. The butter and eggs should be light and fluffy, pale in color, and increased in volume. Otherwise, under creaming your butter can result in cookie spread and a denser texture.
- Scrape the mixing bowl: This may sound like a no-brainer, but with any recipe, it's very important to constantly stop and scrape down the sides of the bowl and your paddle. I like to do this when mixing ingredients for a long period of time and before adding additional ingredients. This stop and scrape method helps ensure all the ingredients are properly incorporated and everyone's invited to the party. Leaving no residue on the bottom or the forgotten sides of the bowl.
- Do not overmix the flour: Since bread flour has a higher protein content than all-purpose flour, it is easier to overmix and build gluten structure which would result in a tougher cookie. And nobody wants that. So, tread lightly when you start adding the flour and add-ins. Mix on low speed for just a few seconds (shouldn't take longer than 20 seconds) until it's just barely incorporated. I like to stop when the flour is about 90% incorporated because it will get fully incorporated once you add the add-ins and mix again. With the mixer stopped, add the cornflake crunch, chocolate chips, and marshmallows and then mix again on low just until incorporated.
- Be mindful of marshmallow placement: When scooping the dough into balls, you have to be a little strategic to ensure you have no exposed marshmallows on the bottoms or lower sides of the dough ball. Why is this important? If you have exposed marshmallows on the sides or bottom, then they will burn and caramelize when baking causing a gooey mess and burnt, hard toffee-like caramel that makes the cookies inedible. So, just take a few more minutes during this process. It'll be worth it. Trust me. You can do this two ways:
- 1) Be strategic when you're scooping ensuring you scoop up the marshmallows first so they're only on the top, the inside, or upper sides of the cookie dough ball, or
- 2) Not adding the marshmallows directly to the cookie dough and manually placing the marshmallows into each cookie dough ball. Do this by placing a few marshmallows into the cookie scoop, then scoop some cookie dough, stuff a few more marshmallows on the inside and finish scooping with the remaining cookie dough. Similar to stuffing an arancini rice ball.
- Bake on parchment paper: As I mentioned before, a lot of people had issues with the cookies spreading. One way to combat that is by baking the cookies on parchment paper rather than a silicon baking mat or Silpat. Due to the nonstick surface of the silicone baking mat, the cookies will spread easier and then bake faster and potentially burn. Um. No thanks. If you'd like to learn more about this, Serious Eats has a detailed article about using silicone baking mats vs. parchment paper when baking cookies.
- Chill and rest the dough: Chill the portioned cookie dough in the refrigerator for AT LEAST 2 hours and up to 3 days. For best results, I like to chill the portioned cookie dough for a minimum of 24 hours. You can also freeze the portioned cookie dough and bake straight from frozen. Chilling the cookie dough does a few things:
- 1) provides more flavor because all the ingredients will have more time to get to know each other,
- 2) will help prevent spreading since they will be going into the oven cold, and
- 3) gives the flour time to get hydrated and soak up all the moisture. Ultimately leading to more flavor, better texture, and less spreading.
- Err on the side of caution with substitutions. Since this recipe is already so high maintenance (creaming and aeration, high protein flour, etc.), I'd err on the side of caution and wouldn't make too many substitutions. That being said, feel free to test and adapt the recipe to your liking, but proceed with caution. For example, I have not tested this recipe with gluten-free flours or dairy free substitutes so I cannot guarantee those substitutions will be successful the first time. It's not impossible, but it may take some tweaking on your part and a few test batches to get it just right.
If you follow these tips and tricks, then I'm confident you, too, will master the perfect Milk Bar cornflake chocolate chip marshmallow cookies. It may seem like a lot, but the cookies are really easy to make once you understand why each step is important. And, although these cookies require a bit more hand holding than the typical cookie, they are worth the extra effort and have become one of my favorite cookies.
How do you get perfectly round cookies?
If you want perfectly round cookies, then use a large biscuit cutter, ring mold, or wide cup (needs to be wider than the cookies) to shape the cookies. When you take the cookies out of the oven, immediately take your biscuit cutter, place it around the cookie, and then gently swirl the biscuit cutter in a circular motion around the edges of the cookie. It's okay if the cookie is a bit stuck on the bottom. Just gently shape the edges. You can loosen the bottoms from the parchment paper once the cookies have cooled a bit more. Do this while the cookie is still hot and pliable. Et voilà! Picture perfect cookies that look like they came straight from Momofuku Milk Bar in NYC.
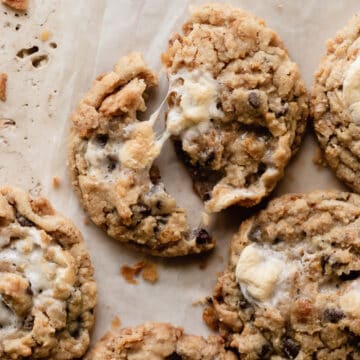
Do the cornflakes stay crunchy?
Yes, they do! That's my favorite part about these cookies. The crunchy texture. I mean. It's not called cornflake crunch for nothing. I find that it's actually crunchier when the cookie is cooled. The key is baking the cornflake crunch prior to adding them to the cookies. Baking not only helps the cornflakes stay crunchy but also gives the milk powder a chance to toast and caramelize a bit.
What do I do with the extra cornflake crunch?
To be honest, the cornflake crunch on its own is addicting. I had to stop myself from snacking on it while it cooled. I've read that others have put the cornflake crunch on top of ice cream. Which I haven't tried yet, but definitely will in the future because it sounds like a winning combination. I think the cornflake crunch would also make a great yogurt or parfait topping.
If you make these, then please tag me on Instagram @studiobaked. I'd love to see them!
Happy baking!
Milk Bar's Cornflake Marshmallow Chocolate Chip Cookies
Crispy yet chewy and sweet and salty with caramel notes throughout. And 100% addicting.
Print Recipe
For the cornflake crunch:
- 5 cups (6 ounces; 170 grams) Cornflakes (I use Kellogg's brand)
- ½ cup (40 grams) dry milk powder
- 3 tablespoons (40 grams) granulated sugar
- 1 teaspoon (4 grams) Kosher salt
- 8 tablespoons (½ cup; 113 grams) unsalted butter, cubed
For the cornflake chocolate chip marshmallow cookies:
- 1 cup (2 sticks; 226 grams) unsalted butter, at room temperature (around 70°F)
- 1 cup (200 grams) light brown sugar, packed
- ½ cup (100 grams) granulated sugar
- 1 large egg
- ½ teaspoon vanilla extract
- 2 cups (250 grams) bread flour (I use King Arthur Baking brand)
- ½ teaspoon baking powder
- ½ teaspoon baking soda
- 1 ¼ teaspoon (6 grams) Kosher salt
- 3 cups (270 grams) cornflake crunch recipe (about ¾ of the recipe)
- ⅔ cup (125 grams) mini chocolate chips
- 1 ¼ cups (65 grams) mini marshmallows (I use Kraft/Jet Puffed brand)
Do not pass Go until you've read the tips above
-
Before you start, I recommend you read the tips listed above in my blog post before proceeding. Every little step counts to ensure the perfect cornflake chocolate chip marshmallow cookie outcome.
Make the cornflake crunch:
-
Preheat the oven to 275°F.
-
In a medium bowl, crush the cornflakes with your hands until they are about one-quarter their original size. Add the milk powder, sugar, and salt and mix to combine. Set aside.
-
In a heavy-bottom skillet or saucepan, melt the cubed butter on medium heat, whisking frequently. Don't be worried if the butter starts to foam up and get bubbly. It will subside. Watching carefully, cook until the butter has browned and you see brown specs and smell a nutty aroma. Remove from the heat and immediately pour into the cornflake mixture. Toss all the ingredients together and mix to combine with a rubber spatula.
-
Pour the cornflake mixture onto a sheet pan lined with parchment paper and bake for 20-25 minutes until toasty.
-
Let the cornflake crunch cool completely before using. If not using right away, you can store it in an airtight container at room temperature for a few days.
Make the cookie dough:
-
In the bowl of a stand mixer fitted with the paddle attachment, beat the butter and sugars together on medium-high for 3 minutes. Stop the mixer, scrape down the paddle, the bottom, and sides of the bowl. Add the egg and vanilla and beat for another 7 to 8 minutes on medium-high speed. Yes, the full 7-8 minutes and not 1 minute shorter; making it a total of 10 minutes (see notes above). At this point, the butter should be light and fluffy and pale in color.
-
In the meantime, mix to combine the flour, baking powder, baking soda, and salt. Once you have creamed the butter for 10 minutes, add the flour and mix on low until about 90% incorporated. This should only take a few seconds. Remember, we do not want to overmix the dough. It's okay if it's not fully incorporated because we will mix one more time.
-
Scrape down the bowl again. Then add the cornflake crunch and mini chocolate chips (and the marshmallows if you prefer to strategically scoop the cookie dough balls rather than manually stuffing the marshmallows into the dough). On low speed, mix just until incorporated, about 15-30 seconds.
Portion, chill, and rest the cookie dough:
-
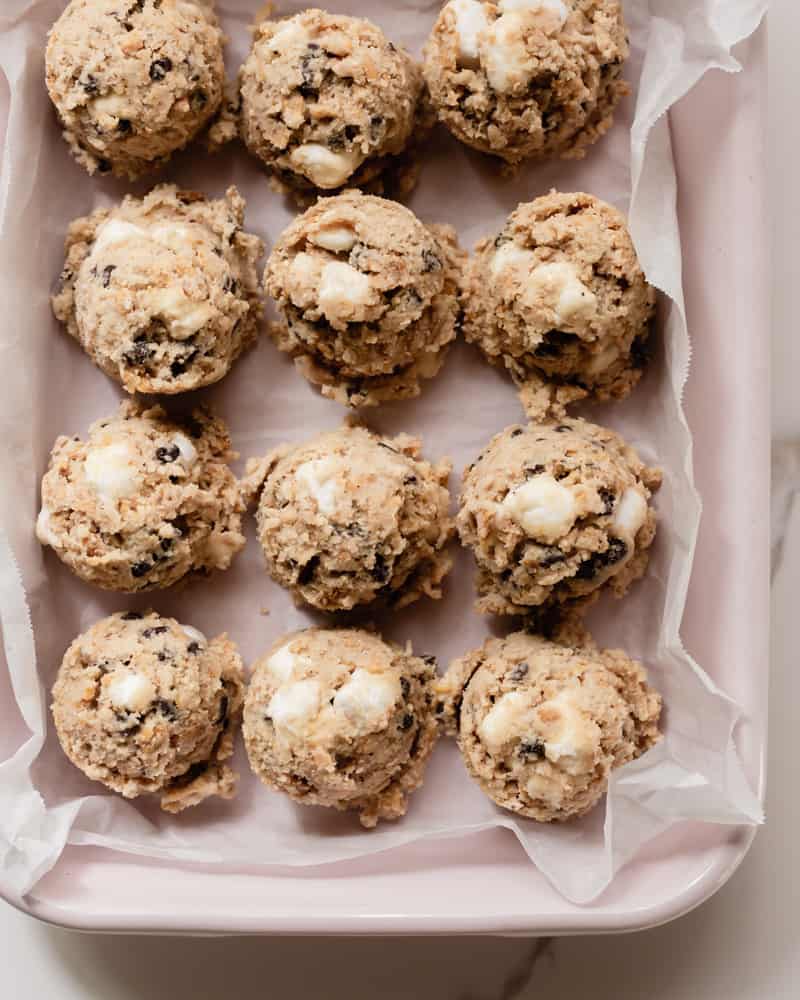
Using a 1-ounce cookie scoop, portion the cookie dough into balls and place onto a parchment paper-lined sheet pan. Remember, it's important to be mindful of the placement of the marshmallows. We want to avoid having any fully exposed marshmallows on the bottom or lower sides of the cookie dough ball otherwise they will burn during baking. If you mixed the marshmallows into the cookie dough along with the cornflake crunch and chocolate chips, then just be sure to scoop the marshmallow pieces first and press the marshmallows into the center if needed. Alternatively, if you didn't add the marshmallows directly into the cookie dough, place 2 marshmallows into the cookie scoop first, then scoop some dough (about ⅓ of the scoop), add 2-3 marshmallows, and then scoop the remaining dough. It's okay if the marshmallows are peeking out on the top or upper sides of the dough ball. We just want to avoid the lower sides and bottoms of the cookies.
-
Arrange the cookie dough balls on a parchment paper-lined baking sheet and wrap the cookie dough with plastic wrap and refrigerate for at least 2 hours up to 3 days. For best results, let the cookies chill and rest for at least 24 hours to help develop a deeper flavor and better texture. I know, I know. Waiting is the worst but it's worth it. You can also freeze the cookie dough balls.
Bake the cookies:
-
Preheat the oven to 350°F.
-
Arrange the cookies on a parchment paper-lined baking sheet leaving space between. At this point, I like to top the cookie dough balls with a marshmallow by gently pushing it onto the top of the dough ball until it sticks. It may deflate the marshmallow but that's okay as long as it sticks to the top. This will ensure you get that Instagram-worthy toasty marshmallow on top.
-
Bake for 11-13 minutes. Shape into round cookies (see note below or tips above).
-
Let cookies cool on the sheet pans on a wire cooling rack. Do not fuss with them for at least 5 minutes or they might crumble if you try to loosen them right away. Once cooled, gently loosen the bottoms using a spatula. Enjoy!
How to get perfectly round cookies: As soon as you take the cookies out of the oven (you must do it while they're still hot and pliable), use a biscuit cutter, ring mold, or cup that is wider than the cookie to shape them into a round circle. Do so by placing the biscuit cutter around the cookie and then gently moving it in a circular motion around the edges of the cookie to shape it into a perfect circle. It's okay if the bottoms are stuck. Just carefully shape the edges. We will loosen the cookies from the parchment paper once they've cooled. This step is not necessary, but makes for a picture-perfect cookie.
Can I freeze these? Yes, absolutely. You can freeze the portioned cookie dough balls and then bake straight from frozen. They may just need a few extra minutes to bake.
Can I bake on a Silpat or silicone baking mat? I recommend baking on parchment paper only in order to prevent spreading.
Course: Dessert, Snack
Cuisine: American
Keyword: Christina Tosi, Cornflake chocolate chip marshmallow cookies, Cornflake cookies, Cornflake crunch, Cornflake crunch cookies, Milk Bar, Milk Bar cookies, Milk Bary NYC, Momofuku Milk Bar
Milk Bar Cornflake Cookie Recipe
Source: https://studiobaked.com/perfecting-milk-bars-cornflake-marshmallow-chocolate-chip-cookies/
Posted by: millernable1969.blogspot.com
0 Response to "Milk Bar Cornflake Cookie Recipe"
Post a Comment